
 |
| There is ocean then a mountain in the distance which you can't see |
 |
| Snow drift higher than my dog. No walkies today. |
I've called the pattern "Trianquility". And no, it's not a typo. Triangle + Tranquility = Trianquility.
Here is my EQ drawing:
Quilt size: 39" x 49"

Here are the fabric requirements:
1 yard of assorted low volume neutrals
1 yard of white
2 yards backing
crib size batting (45 x 60)
1/2 yard binding fabric
This is a very simple pattern once you figure out Half Square Triangles. The secret is in your 1/4" seam and not stretching the diagonal of the blocks. Consistency is key and pays off.
I used my GO cutter for cutting the half square triangles and had them done and ready to sew in no time. (It isthe #55031 4" finished half square triangle die). I LOVE my GO cutter. Instructions for rotary cutter and ruler cutting are below.
We will be making 108 half square triangles.


Rather vanilla you say? Stay with me. It turns out great!
Alternate Cutting:
From your neutrals you will be cutting 8 strips 4 7/8" wide by 42" which you will then subcut into 54 squares measuring 4 7/8 x 4 7/8. You will have to calculate the equivalent if you are cutting from scraps or fat quarters. The key is to cut 54 squares which will yield 108 half square triangles.
Repeat for the white fabric. You will be cutting 54 squares 4 7/8" x 4 7/8".
On the wrong side of the white squares draw a line from corner to corner in pencil or fabric pen. Then match up a neutral square with a white square, right sides together.


Once sewn it should like this.

Now take your ruler that is larger than the diagonal measurement of the block and your rotary cutter and cut on your drawn line between the two stitched lines.
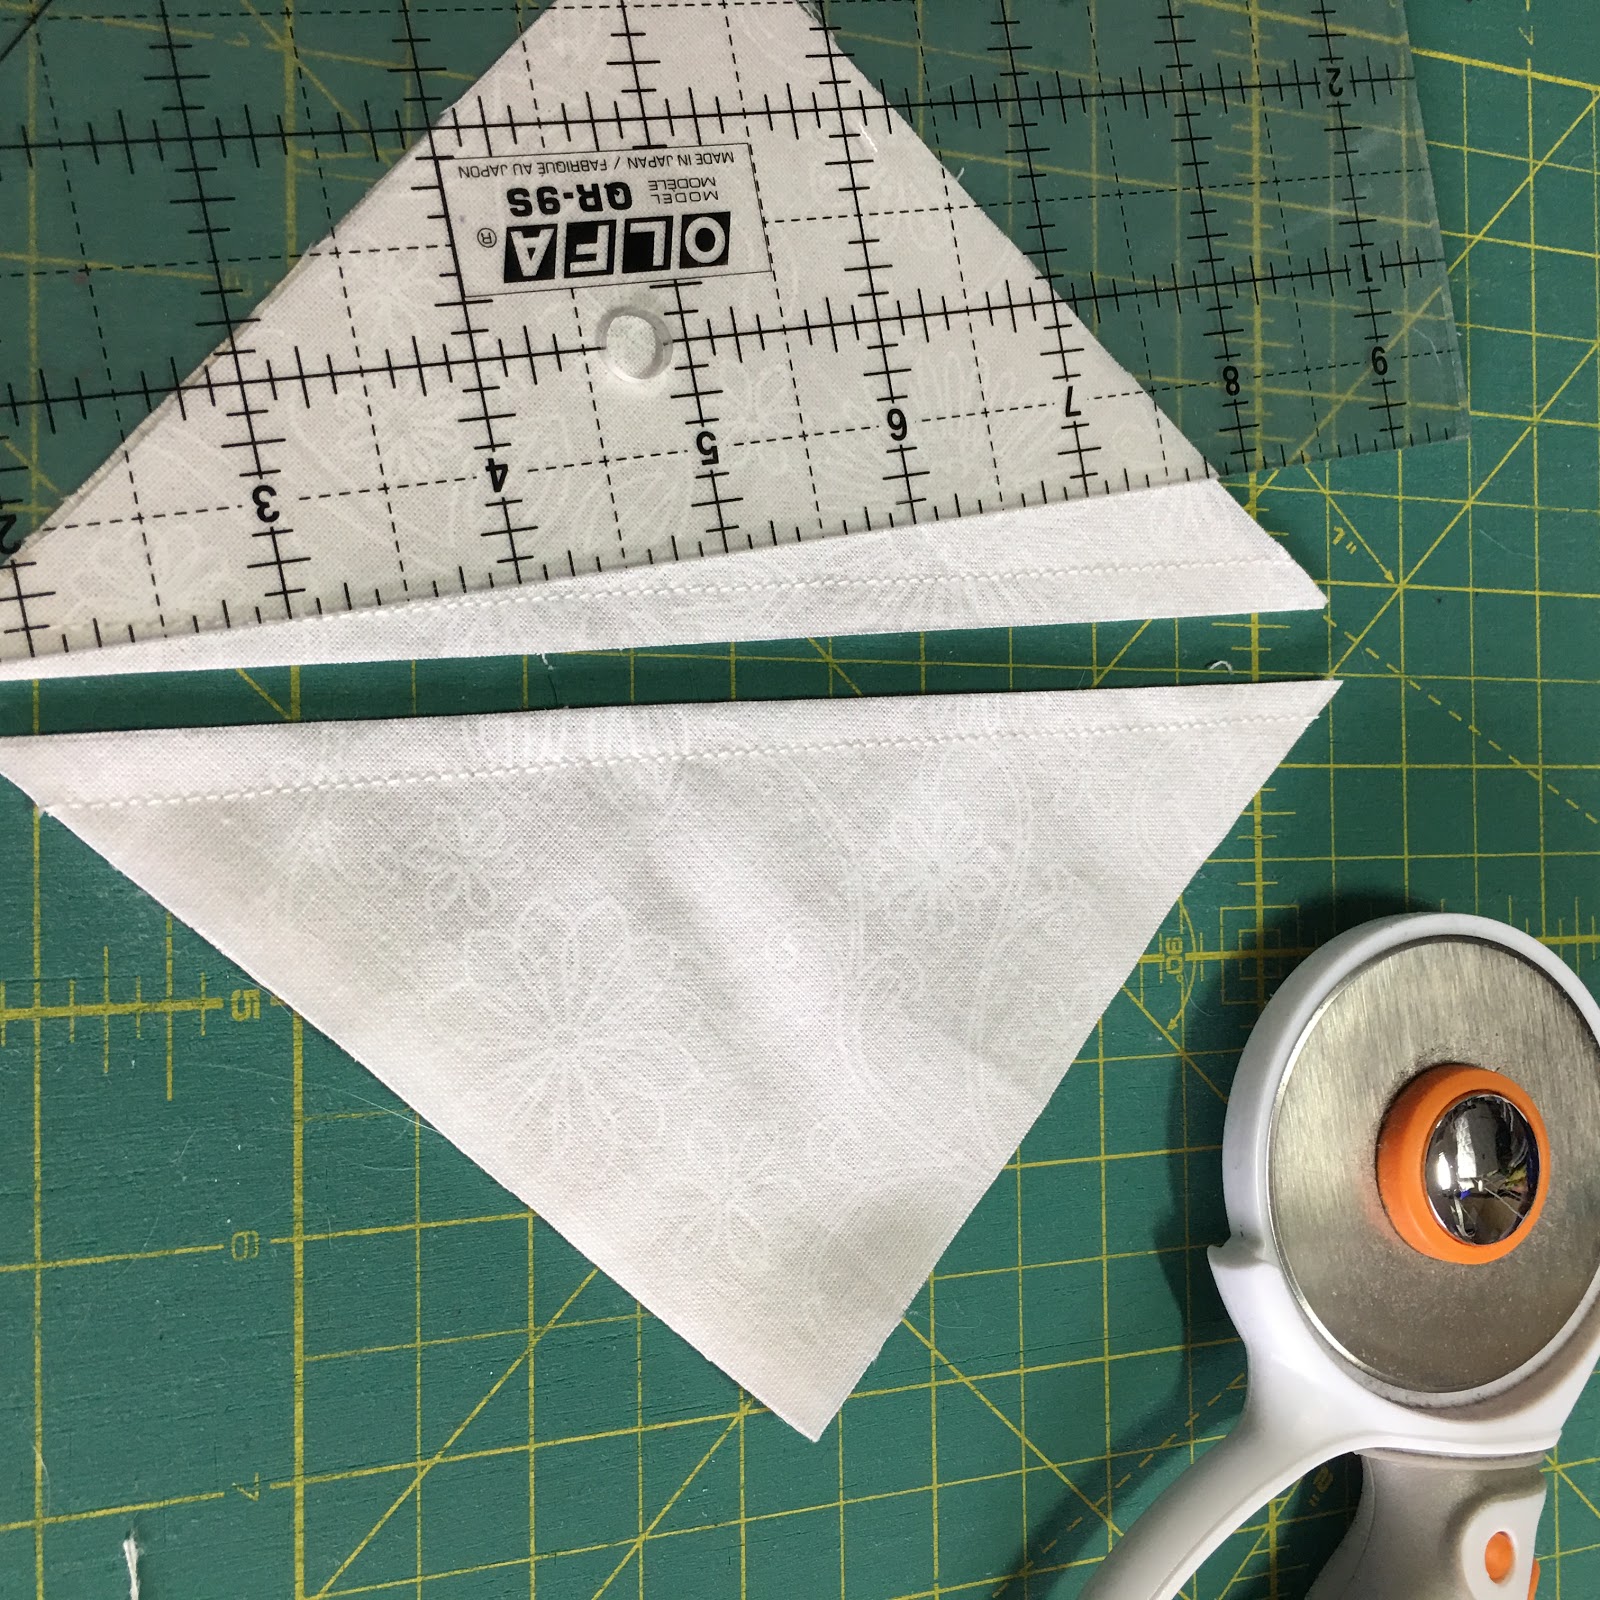
Press and trim if necessary to make your block 4 1/2". It will finish at 4" when sewn into the quilt top.

HELPFUL STASHBUSTER HINT:
Do you have a bunch of charm squares/packs in your stash that you want to use but don't have a plan for? They would be perfect for this quilt pattern. They are just 1/8" bigger than our cut squares so match one up with a neutral square of 5" and follow the same stitching directions and you will yield the same results. You'd need 54 charm squares (5"). Not sure what charm squares are?
These are charm packs. You get a whole fabric line conveniently cut into 5" squares and packaged together. They come ready to sew them up into a beautiful creation! You can find them in most quilt stores or online stores. Try one of my local quilt shops: http://www.clothcastle.com/shop/Quilt-Fabric.htm as they have a great selection.

Now back to our tutorial!
Once you have all your squares sewn and pressed to the dark side, arrange them in 12 rows of 9 blocks. When you have them in the colour order you are pleased with, sew the rows together. You will be pressing one row to the right and the alternate row to the left, and so on. This will make the rows nest together and avoid those pesky bulges at intersections.
Here are my blocks on my design wall:

And sewn together, pressed towards the bottom and ready for quilting.

I chose not to put a border on my quilt, but if you want it bigger you are free to add a border. I quilted my quilt with a pantograph called "Amber". I love the texture it gives to my finished quilt.

I hope you enjoyed this tutorial. I will be writing up the pattern and putting it on my website under the FREE PATTERNS category. Thank you for joining me and happy quilting!
Until next time,
Mavis
c 2019 Mavis Reynolds
PS: Interested in having your quilt finished? Check out my long arm quilting services at www.dayspringquiltcompany.com. Samples of my work are viewable on my Instagram page @dayspringquiltco
No comments:
Post a Comment