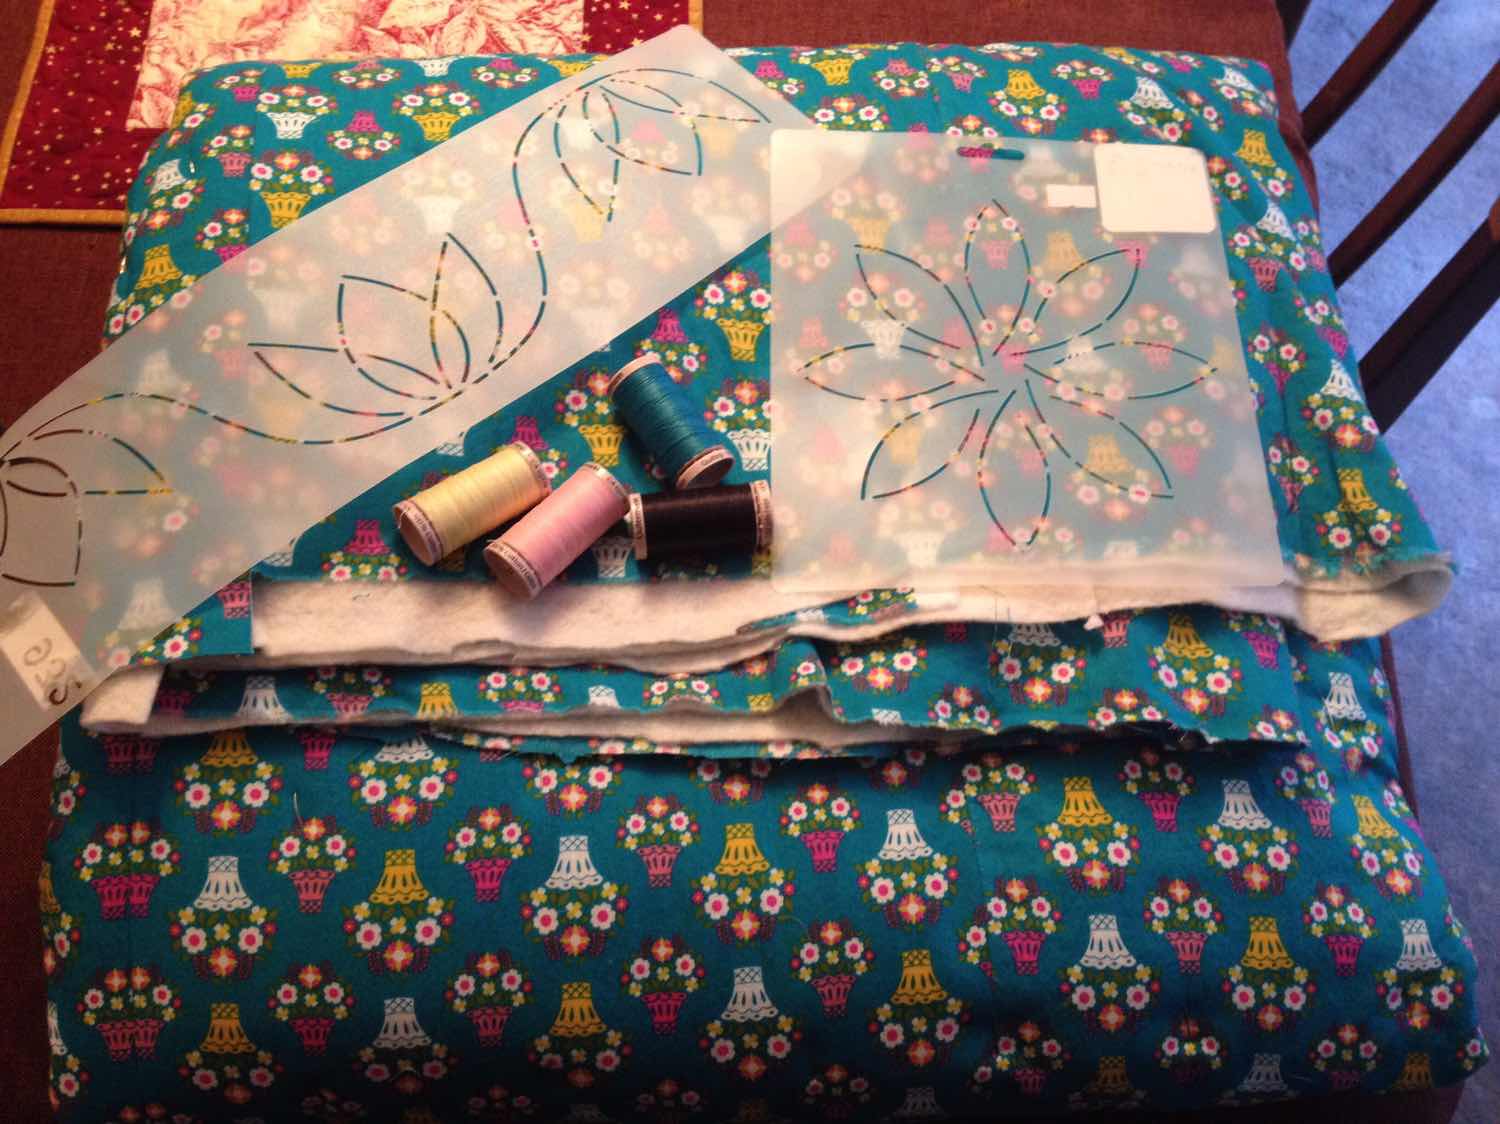
Tuesday, September 17, 2019

What to do when a quilt backing is too short for your quilt

So this happened in my studio yesterday...math isn't my best skill and I readily admit seeking assistance from my math saavy friend when needed.  I had a customer quilt to load and it made use of some leftover diamond pieces to form a star on the back of the quilt.


Quilt back

I think I was so concerned about centering the star on the back of the quilt that I didn't really pay attention to  the measurements I had taken of the quilt back and the quilt top.  She had allowed 4" total backing to the length of the quilt which I know is about half as much as I needed.  But still I didn't catch it.  I knew it would be close but I thought we might have just enough if I was careful at the top.

Firstly to center the back this is what I did:

  1. I marked the center line of the star on the left and right sides of the quilt backing
  2. I marked the center of the top with tape on my takeup roller. So now I had a top and side markers for placement.
  3. I then rolled the backing in the normal fashion.
  4. I added the batting.
  5. When it came time to load the quilt top (Note:  I float my quilt tops), I rolled the quilt back to the middle where my left and right markings were.  I centered the quilt horizontally from that point to see how high on the quilt back I would need to start.  It was going to be tight but I figured I could squeak it out. 


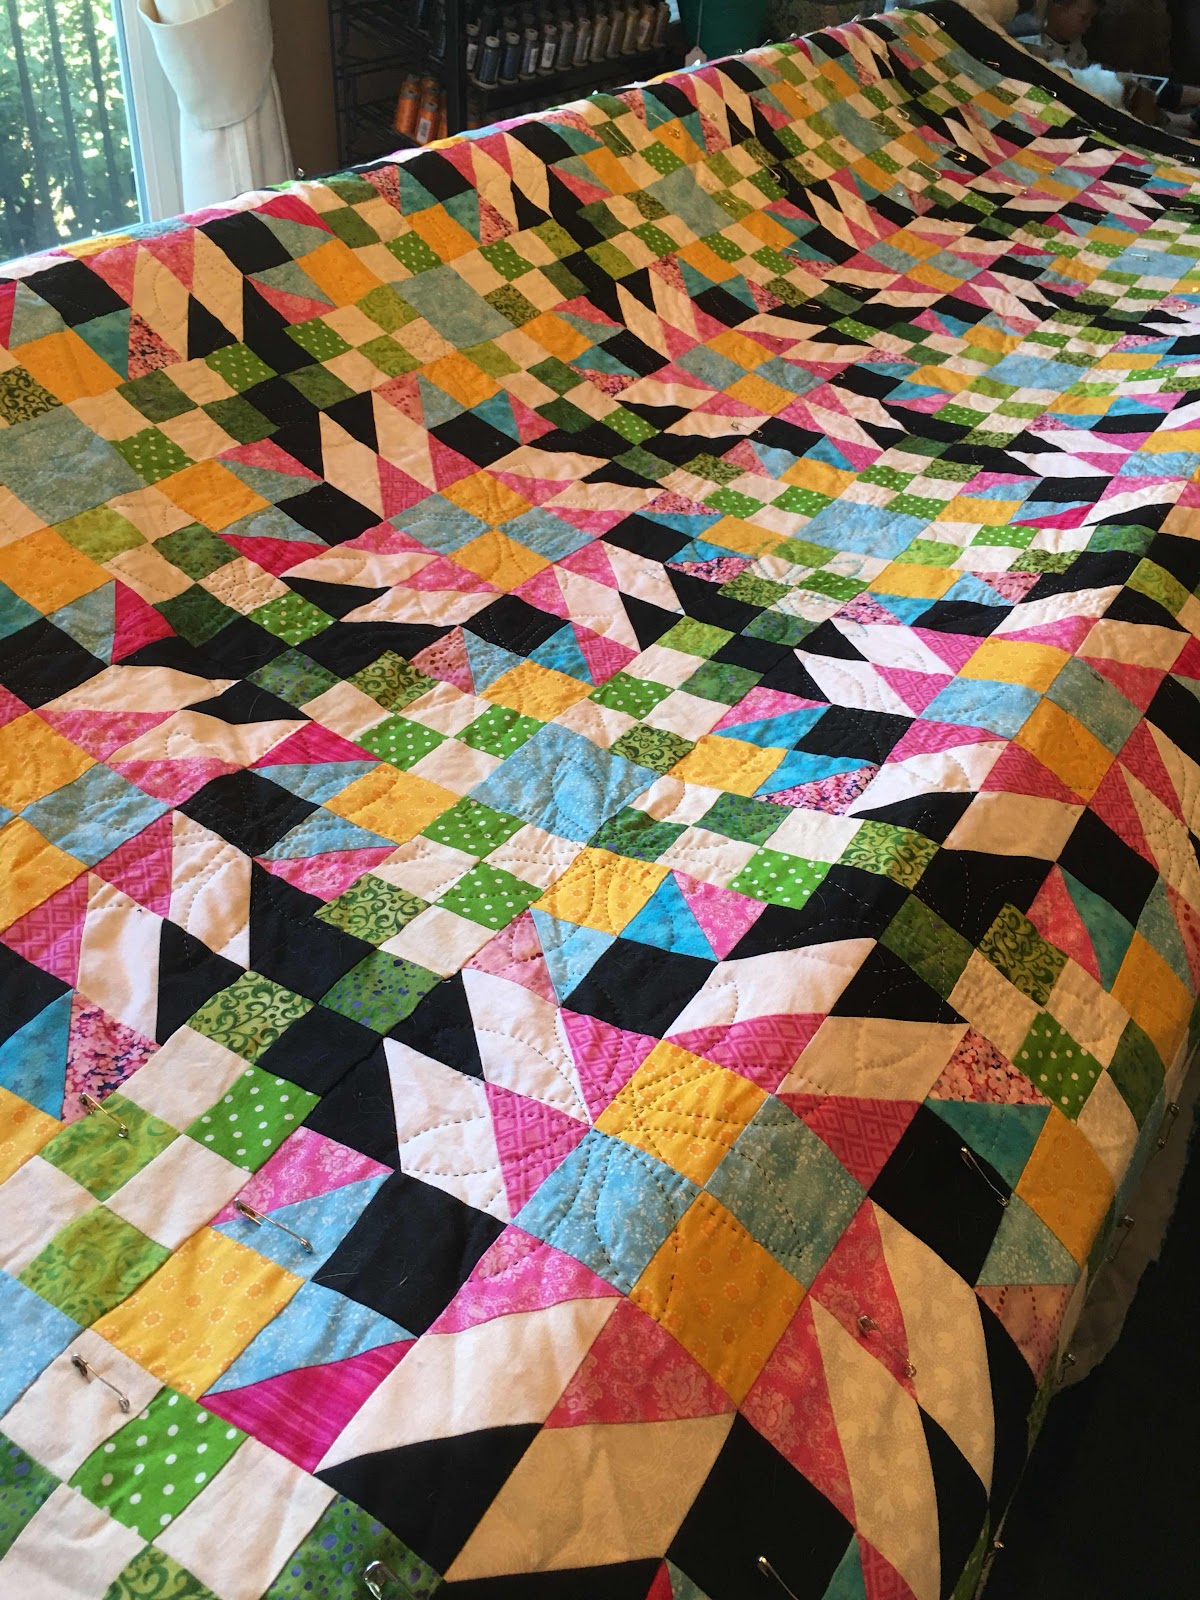
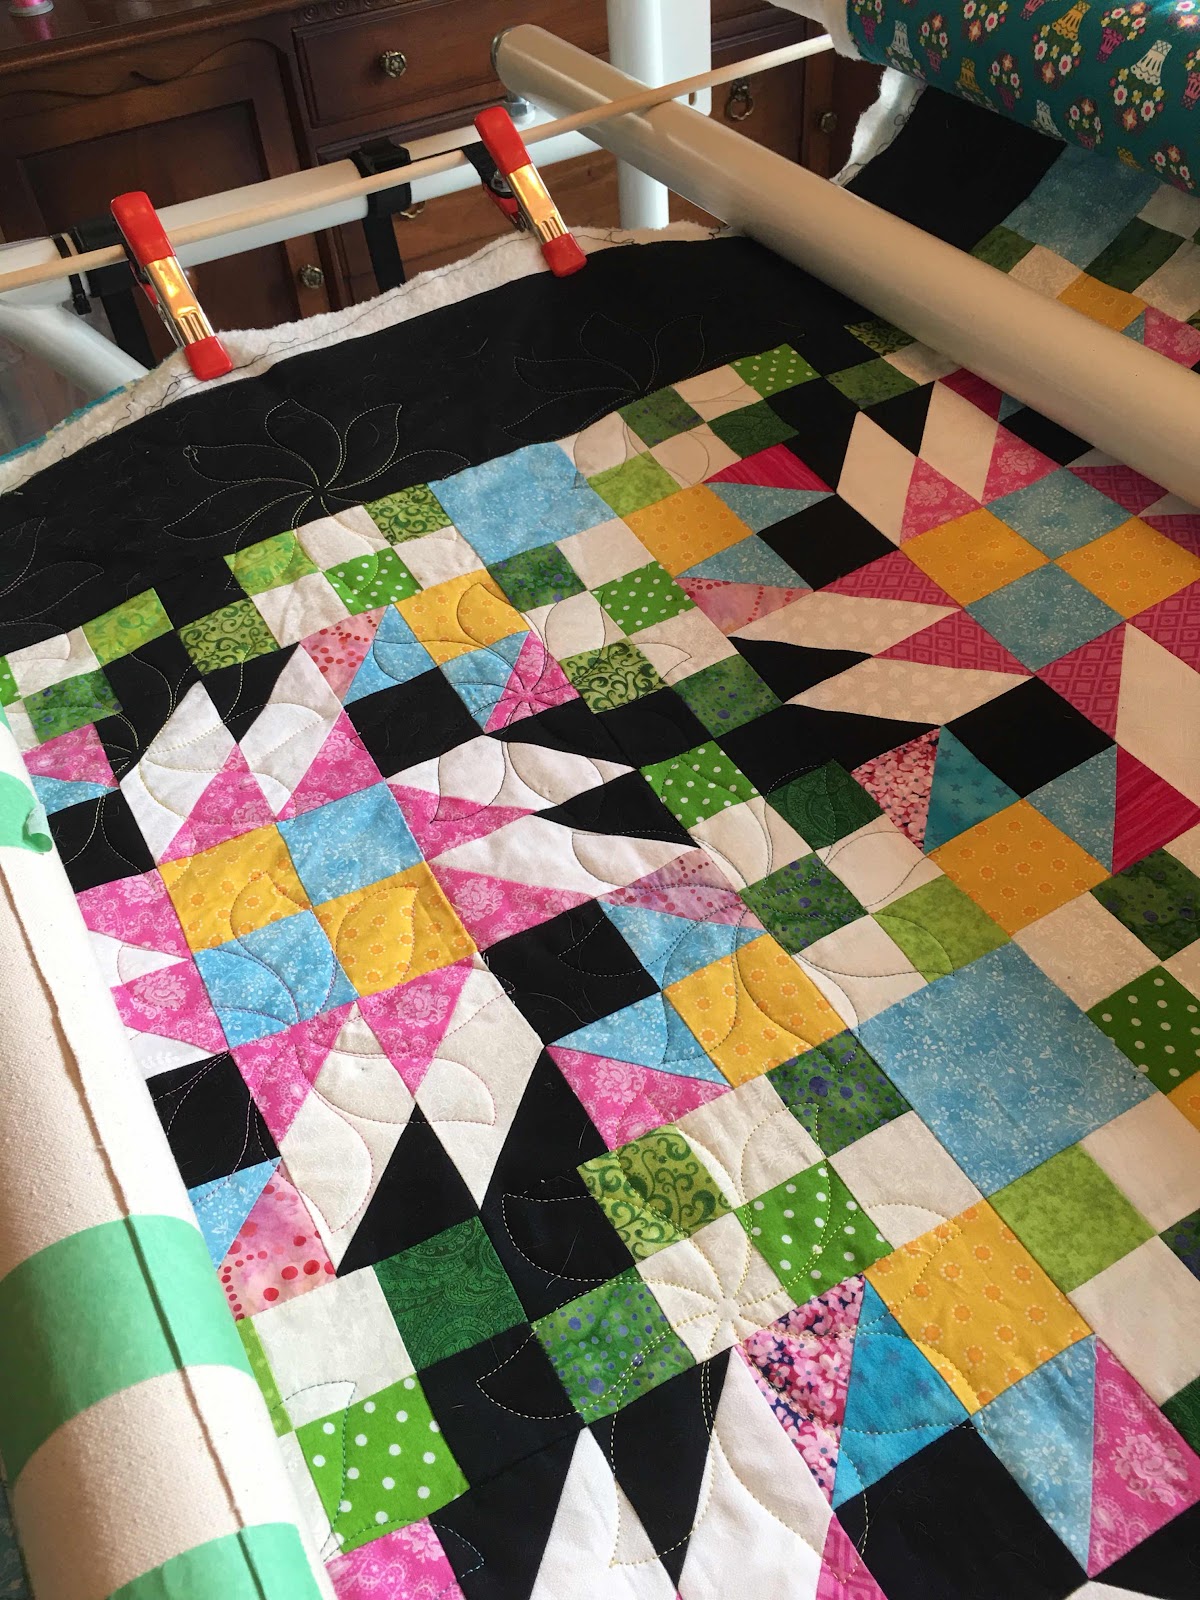
Loaded and ready to quilt!
I happily quilted away knowing there was really no way of predicting just how much backing I would have at the bottom and I told the customer.  I was more concerned than she was.

I got to the second to last row and realized I was about an inch short.  I called my customer to explain the situation and she brought me a six inch strip of the backing of fabric.  At this point you are probably envisioning me unloading the quilt and doctoring up the bottom of the backing right?

Wrong!  I really dislike reloading a quilt once I take it off.  I just find that it's very difficult to line up perfectly again so I pondered my situation over the weekend and yesterday I decided to do unroll the quilt partially so that the bottom was hanging over the front bar of my quilting frame.

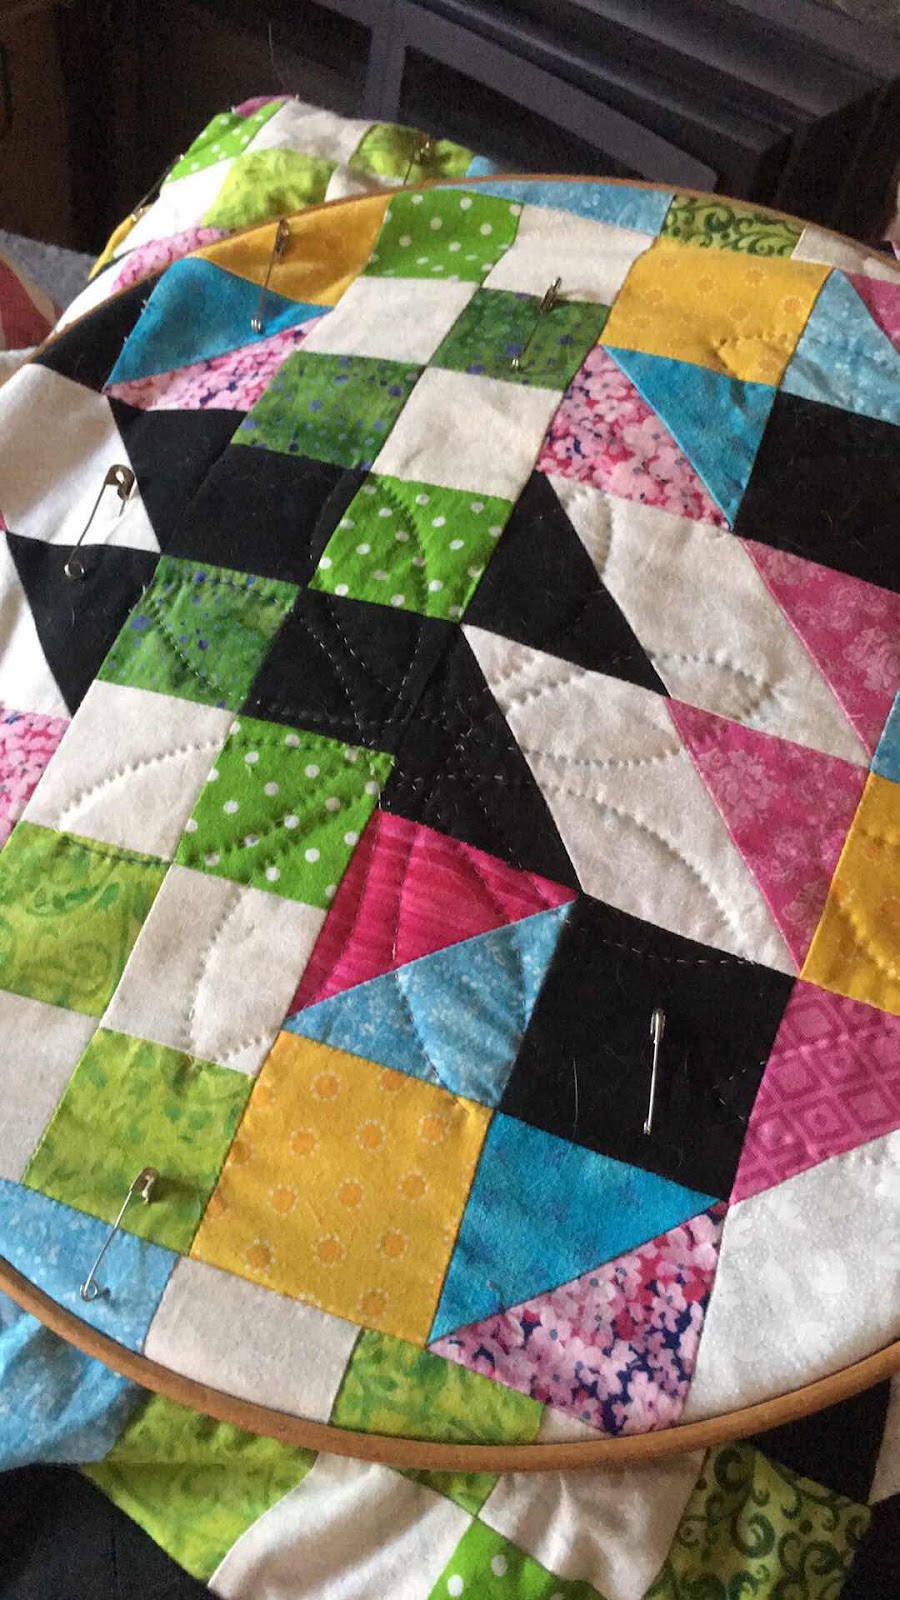
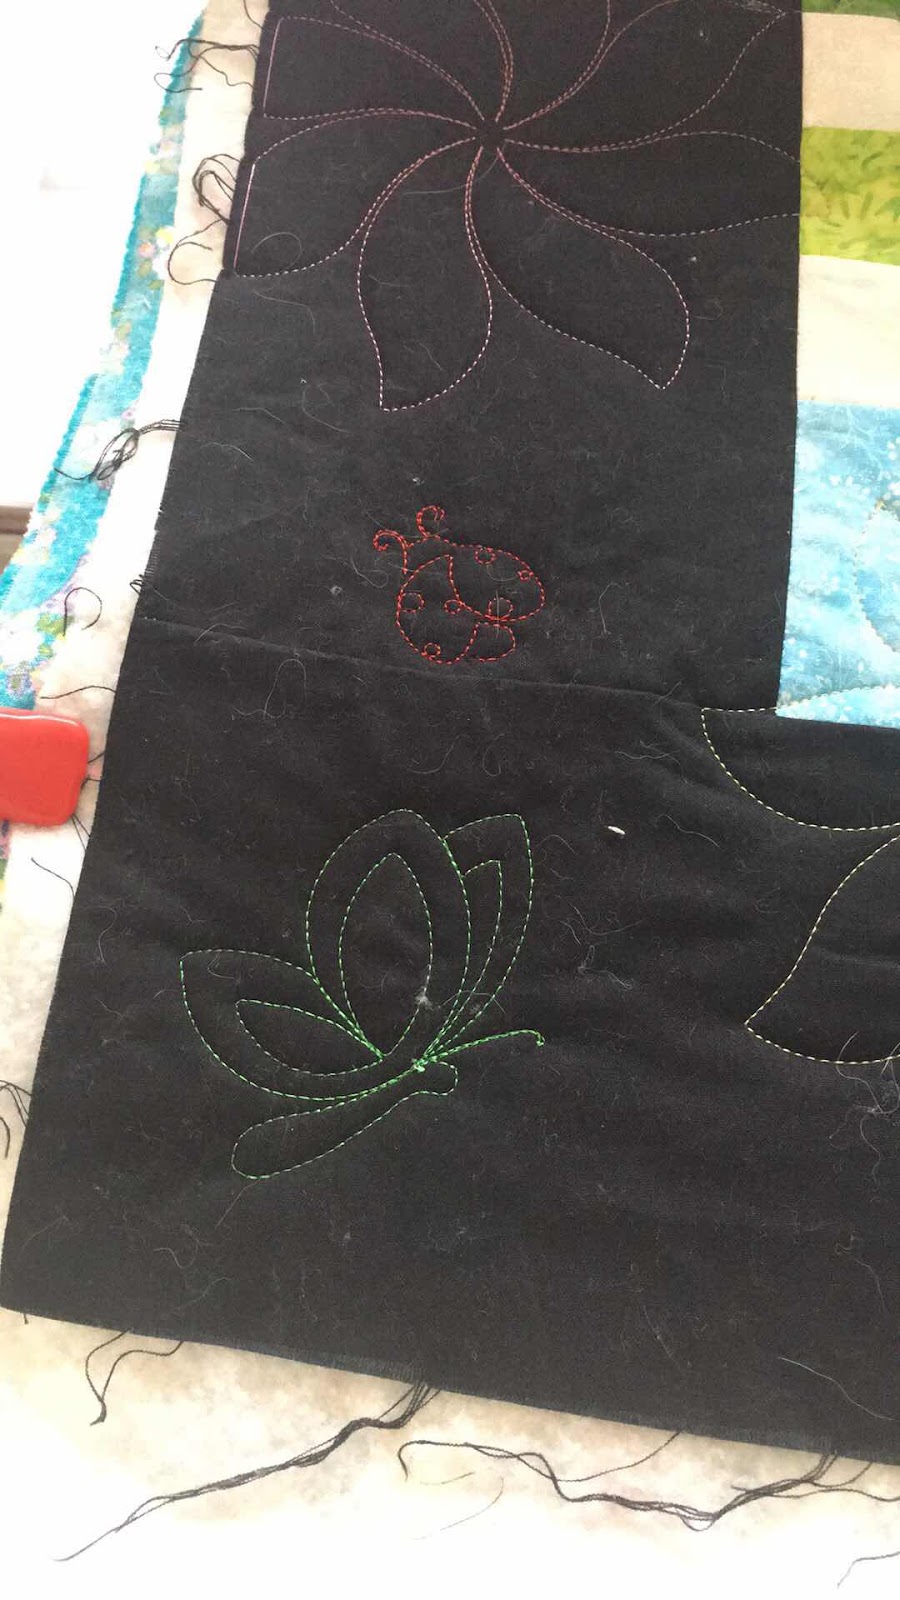
This is the point where I realized ... oh oh!


I have a table which is the perfect height so I brought out my Janome, set it up on this high table and added the 6" strip to the bottom of the quilt.  I would sew about an inch and move the table forward.  Sew another inch and move the table forward.  It worked like a charm.


I then used the front roller to press the seam, reloaded the quilt and I was back in business.


I don't know if I broke every rule in the longarmer rule book, but this worked for me and the result was great.  And the bonus was that I only had to reload the bottom of the quilt which kept it straight during the reload process.

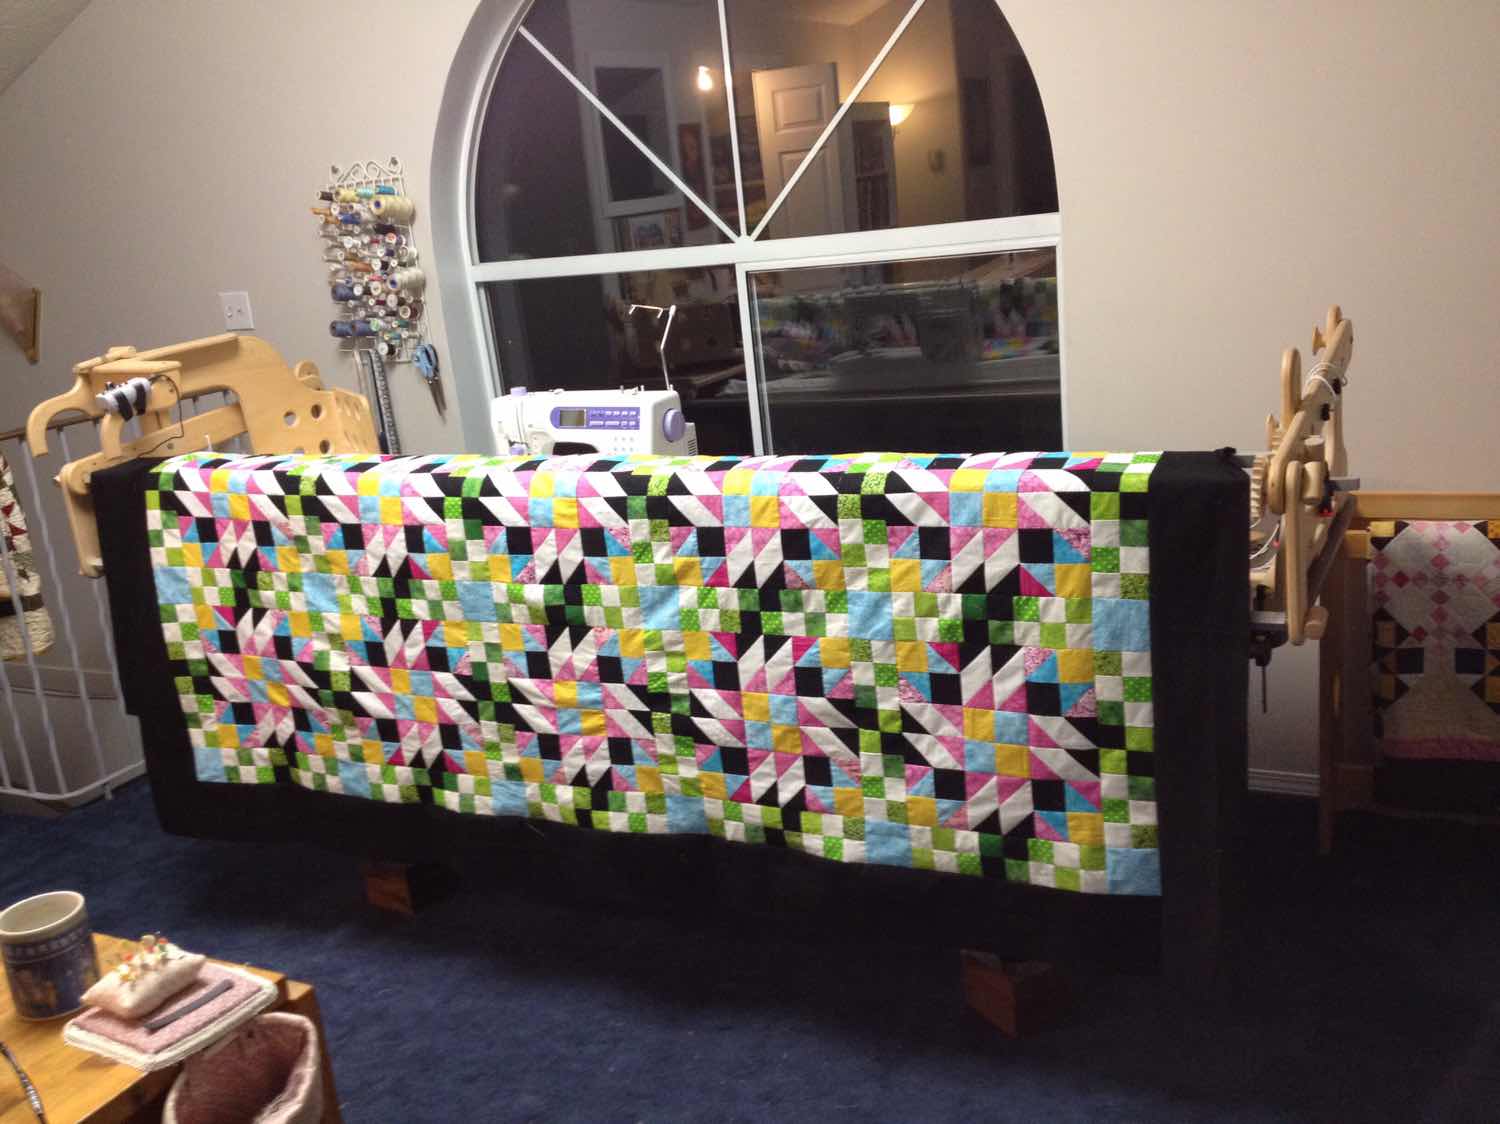
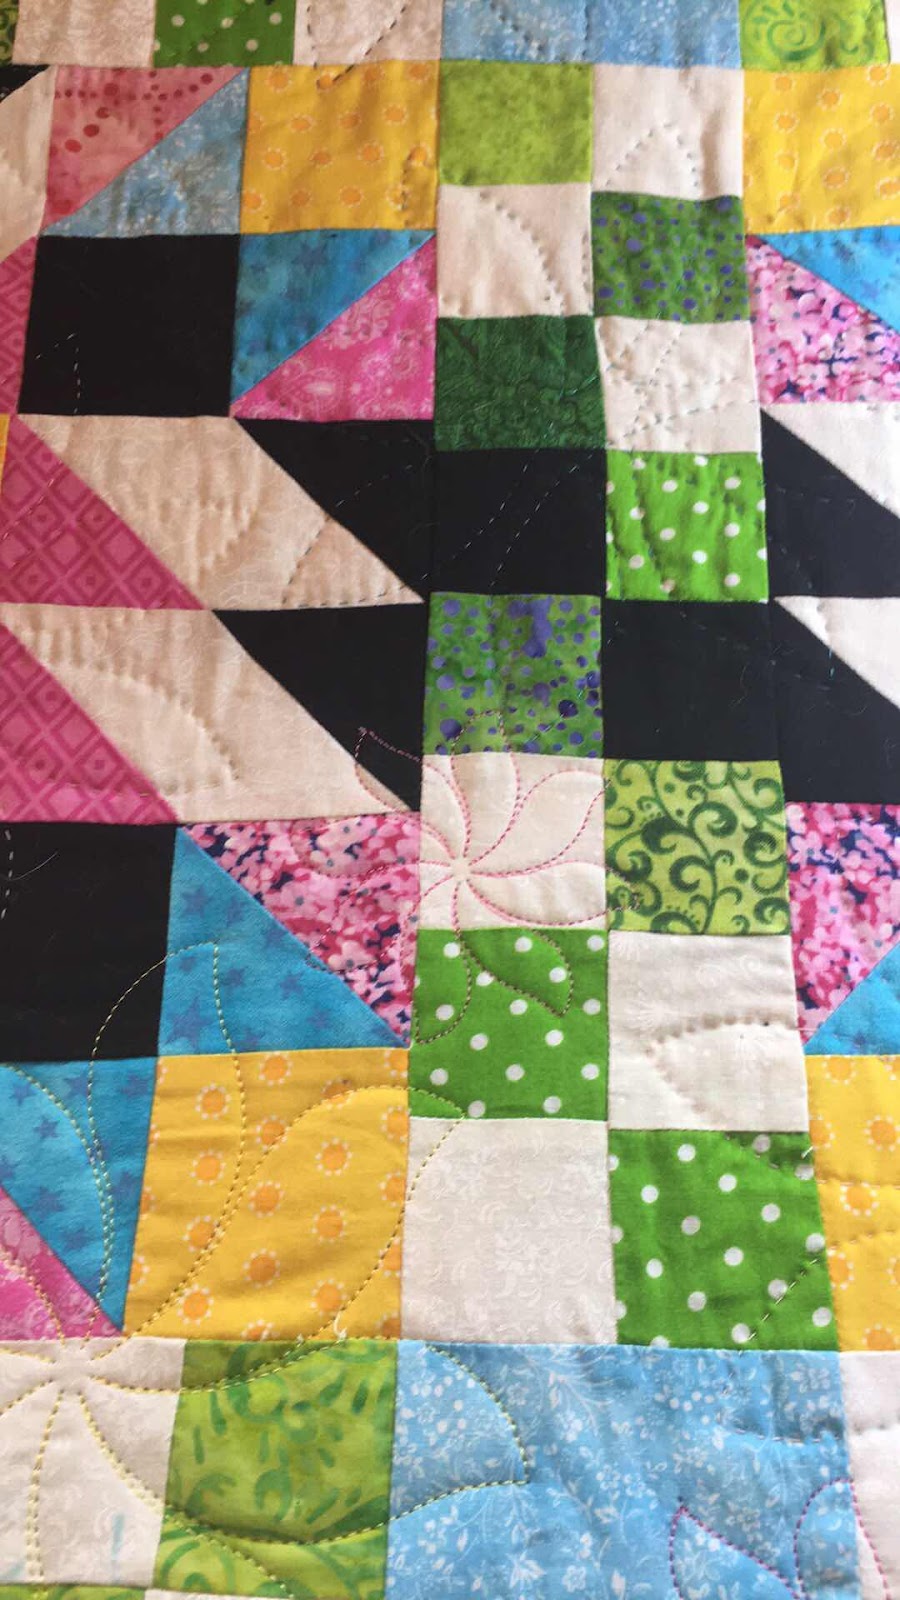
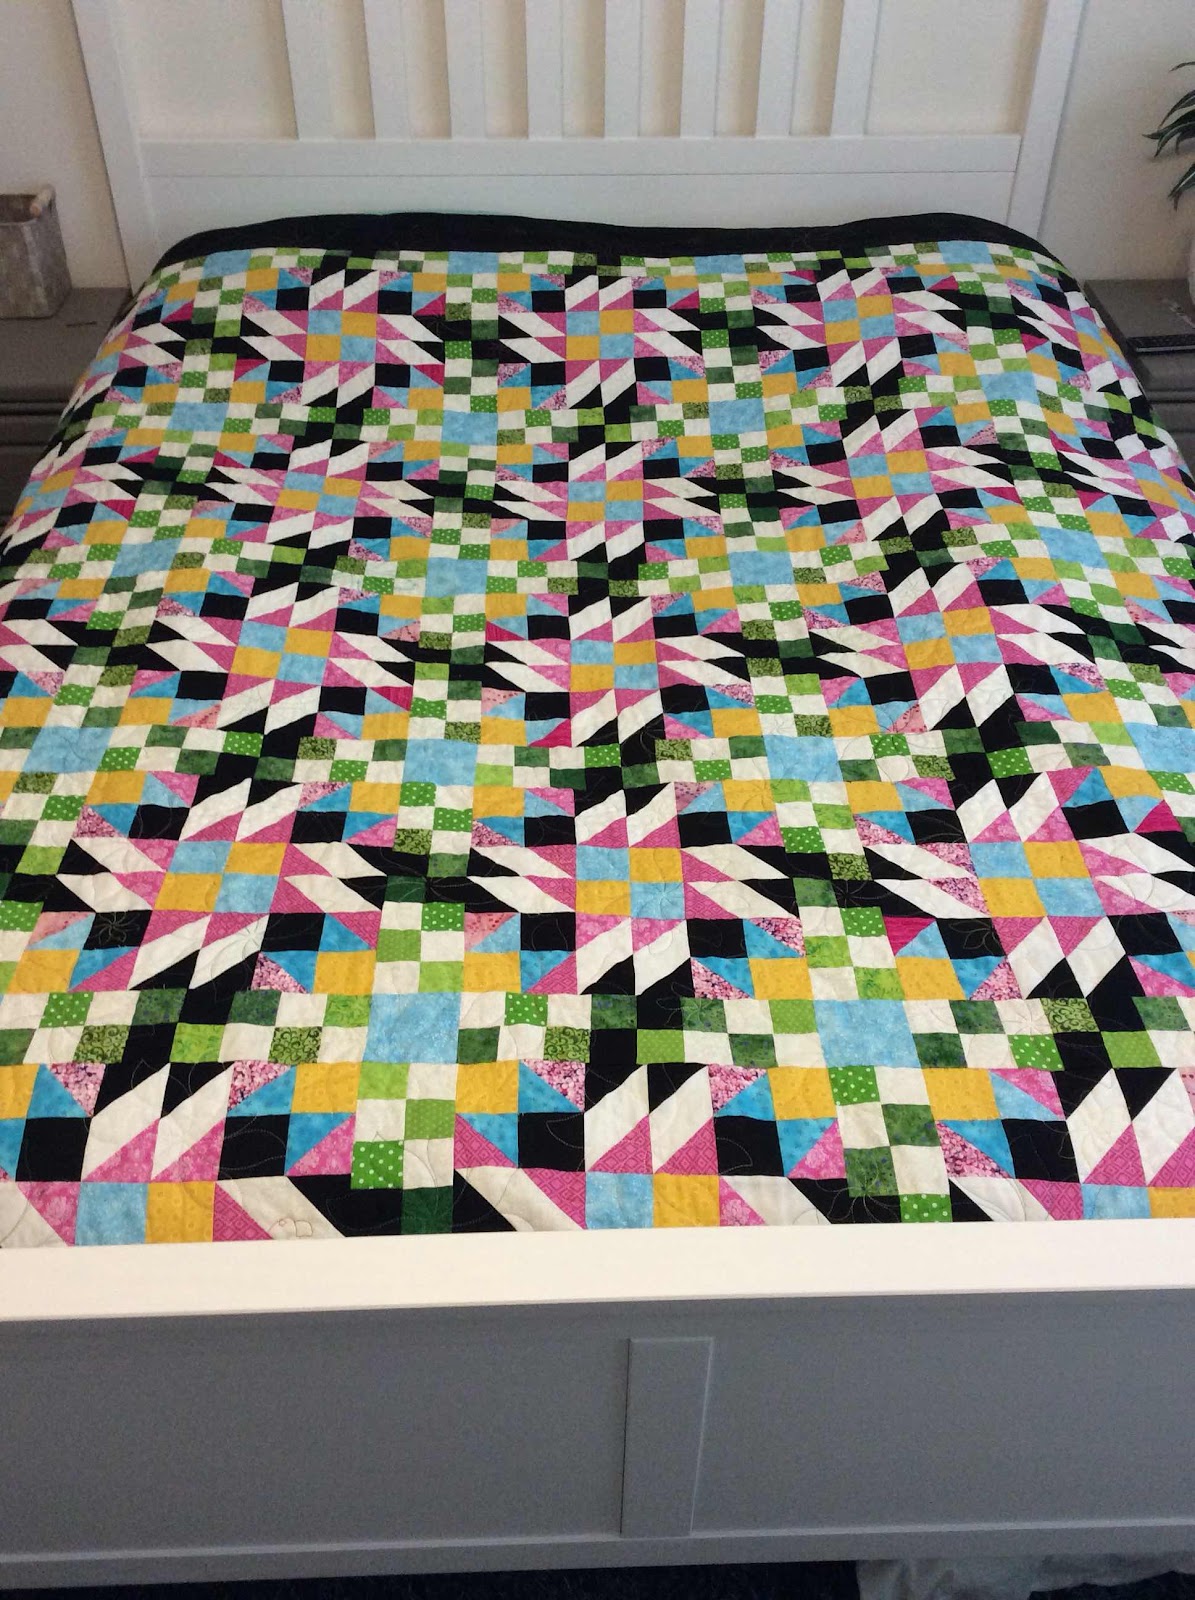
Here is the quilt finished.  And a shameless plug:  This is my original quilt pattern called Amish Block Party.  It's available as a download here:  Amish Block Party pattern.


I taught this class in a local quilt store called The Cloth Castle and this is one of my students' quilt.  She did a fabulous job and I had great pleasure in adding the quilting to finish it off.  The panto I used is called "Pearly Weave" and the thread was Glide Mulberry.


I hope this tutorial helps you think outside the box when you need to fix a problem on the fly.

Until next time!

Mavis

Monday, September 16, 2019

Hand Quilting - Choosing your quilt top...lessons learned

Would you say you are a patient person or an impatient one? I think I tend to be more impatient than patient but I’m working on it. .

About this time every year Bonnie Hunter of Quiltville gets ready to release her annual mystery quilt. I always say I’m going to resist, but I never seem to be able to muster up the self-control to do so.

In 2014 Bonnie released her Grand Illusion mystery quilt.  I love Bonnie’s designs, but if I was really honest I’d have to say that this was not my favourite pattern. I ended up doing my own borders because the other ones with the pattern just didn’t ring my bells. 

I was thrilled when I actually finished the quilt top. This was before I had my APQS millennium.  
And I love hand quilting so I decided that I would hand quilt this one.


 Hand quilting stencils and thread are ready to go!


 All pin basted  and ready for the hoop.


I’ve been placing the flowers randomly over the course of the last four years.


When I look back I really wonder why on earth I decided to spend so many hours on a quilt that would be difficult to quilt because of all the intersections and on one that I really didn’t love. I just kept telling myself I would patiently add the stitches and it will be a lifetime project with no deadline in mind. Right?  Wrong! Along came and impatient moment recently where I had enough of staring at it and having it stare back at me nagging me to work on it. Don’t get me wrong; I love hand quilting but I just think I chose the wrong project this time. So after a lot of debate and actually asking for advice from some online hand quilters I made the decision to finish it on my long arm. I really wondered if I would regret this decision. I found a motif that I could continue in a random fashion across the top of the quilt which I had hoped would have the same feeling as the motif that I had chosen to hand quilt. Loading the quilt onto my long arm was not as difficult as I thought it would be and before long I was happily quilting away adding  flower motifs to my quilt top.


It only took me a little bit over a day to finish it. As I continued quilting these randomly placed motifs I could see that there were some spots between motifs that  needed something in them but I didn’t want to put in a full motif as it would have stitched over an existing one. As it is there were a couple of close calls in fact boo-boos where there are stitches overlapping but I’m not letting the quilt police in the door and I warned my daughter who is  the recipient of the quilt that she would have to let go of some OCD tendencies to really enjoy this quilt. 

I found some cute little motifs of butterflies and ladybugs that I could make smaller and I also made some of the flowers smaller just to fill in those little spots that needed a little something to tie it all together. 


Above is a mixture of hand quilting and machine quilting. 

The end result is that I was able to finish the quilt and give it to my daughter to finish binding because she loves doing that, and the quilt is now living on her bed and she cherishes it. 


I’m delighted to have it done and out of the UFO pile. 

Bonus: I had in my closet a whole cloth quilt that I really wanted to work on but I couldn’t give myself permission until this project was completed. So now I have pulled out my whole cloth quilt and I’m happily adding my stitches to that project. And no intersections! 


I didn’t start this quilt from scratch lest you think I’ve done all of this stitching. I actually purchased someone else’s UFO and am finishing it off. And Cooper is enjoying our time together. 


So that’s the story of how I finished my Grand Illusion mystery quilt UFO. I’m so happy to cross another long-standing project off the list.

Until next time, I’ve got some slow stitchin’ to keep me busy. 

Mavis 

Thursday, March 7, 2019

What if scenarios for the stash...

It all started with me staring at this:


This is my humble stash.  Not shown are the strip bins in my closet containing ample strips in a variety of widths. For the most part those strips are neglected (moment of honesty!).  I do love scrappy quilts and fully intend on putting them to good use some day.

But the challenge of the week is to use up the yardage on the shelves in the top picture.  It sits at the back of my cutting table and I am constantly reminded that these fabrics, most of which I really love, really don't match with the other fabrics in my stash.  Oh dear!  I usually buy something because I love it, not because I have a plan in mind.   So when you want to use them in a quilt, it makes it a bit more difficult to figure out just what to do with them.

I decided to start here with this fabric.  I don't LOVE it, but I LIKE it for sure.


But what the heck am I going to do with it??

I found these comrades close by and thought that perhaps if I made a column quilt I could cut bigger pieces thereby making a baby quilt quickly and using up a lot of this fabric.  So here's what I did:


Maybe a bit of applique to break up the monotony?


Not liking the heart.  All I see is that the lines in the heart don't match up with the strips.


Better!  This teddy bear fabric brings out the blue and uses up ancient stash/scraps.  Bonus!

And so it kinda went like this:

Quilt top complete

Enough fabric for the backing! Yippee!


Then it was time to load the quilt on Millie and finish this quilt!  I chose a meandering heart pantograph to stick with my theme.  I think it works nicely.


And it's done!  I left the binding for another day.  This quilt accomplished a few things in my studio:

1.  I used up some of my STASH!!  I do have a bit left over which I now don't mind chopping into strips and squares for the scrap bins.
2.  I made a baby quilt in a day (from concept to quilting).  Cutting big pieces was the key.  And I used my GO cutter and heart die with steam a seam lite to do the applique.  I then stitched around the hearts and inserted these blocks into the alternate strips.
3.  I had a great feeling using my stash and it did kind of release what was bogging me down so the end result was FREEDOM!

If you would like to make this quilt with some floundering stash, here are the directions.  Free that stash!  Free yourself!  Make a quick quilt to give away.  You will feel good!

You will need:
 4 x 4 1/2" strips by width of fabric of focus fabric (my striped one) (approx 44").  It doesn't need to be striped.
7 x 2 1/2" strips of a lighter coordinating fabric by width of fabric.
3 x 2 1/2" strips of a medium/dark coordinating fabric by width of fabric.
6 x 4 1/2" squares in the lighter coordinating fabric for applique.
6 appliqued shapes of your choice cut from a scrap of another coordinating colour.

Start by joining one light strip to one strip of focus fabric for the left and one light strip to one strip of the focus fabric for the right.  These actually create the side borders of your quilt.

Now make three strip sets with one light and one medium/dark fabric.

Lay out your fabrics as follows but DO NOT sew them together.  Note that the position of the light and dark fabric alternate to frame the focus fabric.

Layout: Left focus fabric, one strip set with light on the left, focus fabric, one strip set with  dark on the left, one focus fabric, one strip set with light on the left, the final focus fabric with the light strip on the right.  You are constructing this quilt top in columns. Don't sew them together just yet.

Making sure all the tops are even, measure down 12 1/2" and slice the strip set to insert the first applique block.  Sew the top and bottom of the applique  square making sure that you don't mix up the order of the strip sets.  Space them second cut another 12 1/2" from the bottom of the applique and repeat the slice and insert of the second applique block in your first column.  This will be the same procedure for the third column of strips/applique.

For the second column of strips I cut 6 1/2" from the top to stagger the placement of my applique block, and then 12 1/2" from the bottom of the first applique in that column.  Once your applique is done and inserted into these strip sets, you can now sew your columns together.  You will have extra strip set fabric at the bottom of the quilt which can be chopped off to match the bottom of your focus fabric length.

Once your quilt top is together with the side borders already attached, it's now time to add the top and bottom strips to complete the borders.  Measure through the middle of your quilt top and then cut the remaining 2  2 1/2" strips into two strips at that measurement.  Now ease in those strips to the top and bottom of your quilt top and voila baby quilt!

Options:
You can hand applique down your pieces;
You can omit applique and fussy cut a pattern from other fabric to insert.
You could make scrappy columns to use up strips that coordinate (hmmm why didn't I think of that earlier!!??)
If you machine applique your blocks, you can either use a raw edge and just sew them down with a straight stitch, a button hold stitch or a blanket stitch (which is what I did).


Here is my finished quilt (except for the binding to be sewn down).

Until next time, I encourage you to go look for a treasure in your stash and try this!  It's fun and quick. :)

Mavis

Tuesday, February 26, 2019

Colour Intensity and Playtime

I was very fortunate this month to receive cataract surgery on both eyes.  Wowsers!  Who turned all the lights on?!??  The clarity...the depth and intensity of colour...the crispness...I had no idea what I was missing.  Of course, as a quilter working with fabrics, this only made the experience that much better.

I played with some bright colours the last few weeks and here are a few of the samplings of what I've been working on.

First of all, I quilted this On Ringo Lake variation on Millie.


Then I quilted this adorable baby quilt:

Panto:  Butterfly Swirls; Thread: Glide Pink


And I ended up diving in three months late on the Good Fortune mystery quilt by Bonnie Hunter of Quiltville (slightly amended).  Two of these fabrics are scraps of backing fabric which were just what I needed to complete my pallette.  I'm loving it so far.  I don't know yet how big it will be.  I expect that will depend on how far the stash fabric goes because I'm not buying anything new to create this quilt.  For real!!


There was also some playing with more subdued colours, namely the dark and medium blues in my 365 Quilt Challenge by Kathryn Kerr.


It was a very SEWful week. <3


Until next time,
Mavis


Tuesday, February 12, 2019

TRIanquility...my newest pattern/tutorial

We are still snowed in and the tree blossoms we enjoyed and boasted about last week have been obliterated by our Snowmaggaedon.  In defense of us West Coasters our snow is "different" than the rest of Canada, or so I'm told.  I can feel you all rolling your eyes at us West Coast drama queens.  But our little village of Brentwood Bay has all but shut down. We haven't seen a bus in days, the airport is without power and they are using a generator to land planes safely and there are no traffic sounds in our neighbourhood.  I like it!  But get the picture? We aren't going anywhere!  Nothing to do here but quilt and create patterns!

There is ocean then a mountain in the distance which you can't see

Snow drift higher than my dog.  No walkies today.
Now to the quilting and pattern writing.  I wanted to create a simple baby quilt in low volume neutrals.  I've used various hues of white, cream, beige and grey.  This will be gifted to a friend's grandchild shortly.  Since I created the pattern for myself I thought I should share it with you also.

I've called the pattern "Trianquility".  And no, it's not a typo.  Triangle + Tranquility = Trianquility.

Here is my EQ drawing:

Quilt size:  39" x 49"


Here are the fabric requirements:

1 yard of assorted low volume neutrals
1 yard of white
2 yards backing
crib size batting (45 x 60)
1/2 yard binding fabric

This is a very simple pattern once you figure out Half Square Triangles. The secret is in your 1/4" seam and not stretching the diagonal of the blocks.  Consistency is key and pays off.  

I used my GO cutter for cutting the half square triangles and had them done and ready to sew in no time.  (It isthe #55031 4" finished half square triangle die).  I LOVE my GO cutter.  Instructions for rotary cutter and ruler cutting are below.

We will be making 108 half square triangles.


One stack of neutrals (cream, grey) and one stack of whites.


Rather vanilla you say?  Stay with me.  It turns out great!

Alternate Cutting:
From your neutrals you will be cutting 8 strips 4 7/8" wide by 42" which you will then subcut into 54 squares measuring 4 7/8 x 4 7/8.  You will have to calculate the equivalent if you are cutting from scraps or fat quarters.  The key is to cut 54 squares which will yield 108 half square triangles.

Repeat for the white fabric.  You will be cutting 54 squares 4 7/8" x 4 7/8".

On the wrong side of the white squares draw a line from corner to corner in pencil or fabric pen.  Then match up a neutral square with a white square, right sides together.


 With right sides together sew 1/4" away from the drawn line.

When you get to the end pull your piece out a bit and turn it to sew on the other side.  ***Notice you are sewing to the left of the line.  Instinct will tell you to sew on the right but you can't measure 1/4" on the right.


 Once sewn it should like this.


Now take your ruler that is larger than the diagonal measurement of the block and your rotary cutter and cut on your drawn line between the two stitched lines.


Press and trim if necessary to make your block 4 1/2".  It will finish at 4" when sewn into the quilt top.

HELPFUL STASHBUSTER HINT:

Do you have a bunch of charm squares/packs in your stash that you want to use but don't have a plan for?  They would be perfect for this quilt pattern.  They are just 1/8" bigger than our cut squares so match one up with a neutral square of 5" and follow the same stitching directions and you will yield the same results.  You'd need 54 charm squares (5").  Not sure what charm squares are?  
These are charm packs.  You get a whole fabric line conveniently cut into 5" squares and packaged together.  They come ready to sew them up into a beautiful creation! You can find them in most quilt stores or online stores.  Try one of my local quilt shops: http://www.clothcastle.com/shop/Quilt-Fabric.htm as they have a great selection.


Now back to our tutorial!

Once you have all your squares sewn and pressed to the dark side, arrange them in 12 rows of 9 blocks.  When you have them in the colour order you are pleased with, sew the rows together.  You will be pressing one row to the right and the alternate row to the left, and so on.  This will make the rows nest together and avoid those pesky bulges at intersections.

Here are my blocks on my design wall:


And sewn together, pressed towards the bottom and ready for quilting.


I chose not to put a border on my quilt, but if you want it bigger you are free to add a border.  I quilted my quilt with a pantograph called "Amber".  I love the texture it gives to my finished quilt.


I hope you enjoyed this tutorial.  I will be writing up the pattern and putting it on my website under the FREE PATTERNS category.  Thank you for joining me and happy quilting!


Until next time,
Mavis
c 2019 Mavis Reynolds

PS:  Interested in having your quilt finished?  Check out my long arm quilting services at www.dayspringquiltcompany.com.  Samples of my work are viewable on my Instagram page @dayspringquiltco